Hello World!
In this tutorial, you’ll create and publish your first bot onto Swiftchat. Following are the high level steps:
Create Swiftchat business account
Setup a Bot in Swift chat
Clone the repo “Chatbot Starter Kit”
Host the bot locally using ngrok
Setting Up Webhook URL
Start Your Bot
1. Create Swiftchat Business Account (SwiftChat Merchant Account)
If you’ve not setup a Swiftchat account yet, please follow the instructions here and also obtain your API Key which will be used to call Swiftchat APIs.
2. Setup a Bot in Swiftchat
To publish our bot on Swiftchat, we need to setup a Bot on Swiftchat Dashboard. Please follow the instructions here to set up one.
3. Clone the repo “Chatbot Starter Kit”
You may any framework to build your backend. To quick start, we’ve created a Chatbot Starter Kit. It has a sample code structure of a typical Bot application, which will help you to kick start without wasting time on setting up boilerplate code. Please follow the README given in repo to setup and run the code.
Make Changes to the Starter Kit Code as per your Bot Configurations
Open the cloned respository in your preferred code editor
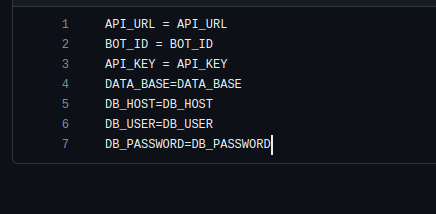
Navigate to .env.text file and change it’s name to .env. Update the value of .env file with your actual data.
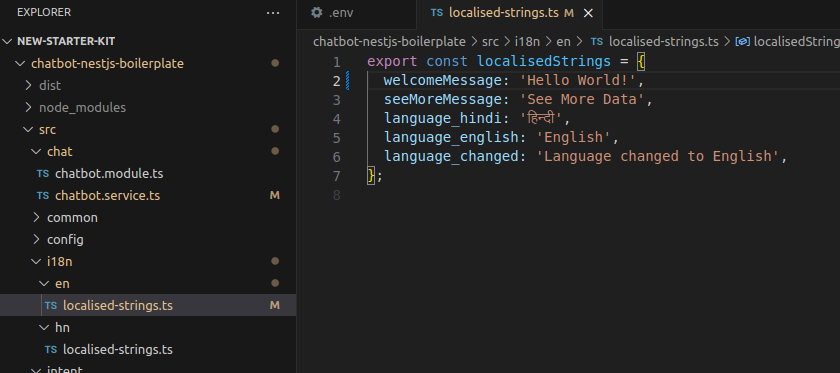
Now navigate to the i18n folder and then access the en and hn files. Update the welcome message as required and save the changes. Here we will add “Hello World” to demonstrate
4. Host the bot locally using ngrok
You can either publish this application on various cloud services like Heroku, Firebase, AWS, etc. or you can try NGRok which will create a reverse proxy for your locally hosted bot. To use Ngrok,
First, download ngrok from the NGRok official website
Open a terminal or command prompt and Navigate to the directory where ngrok is installed or accessible.
To expose your locally hosted bot application to the internet, run the following command :
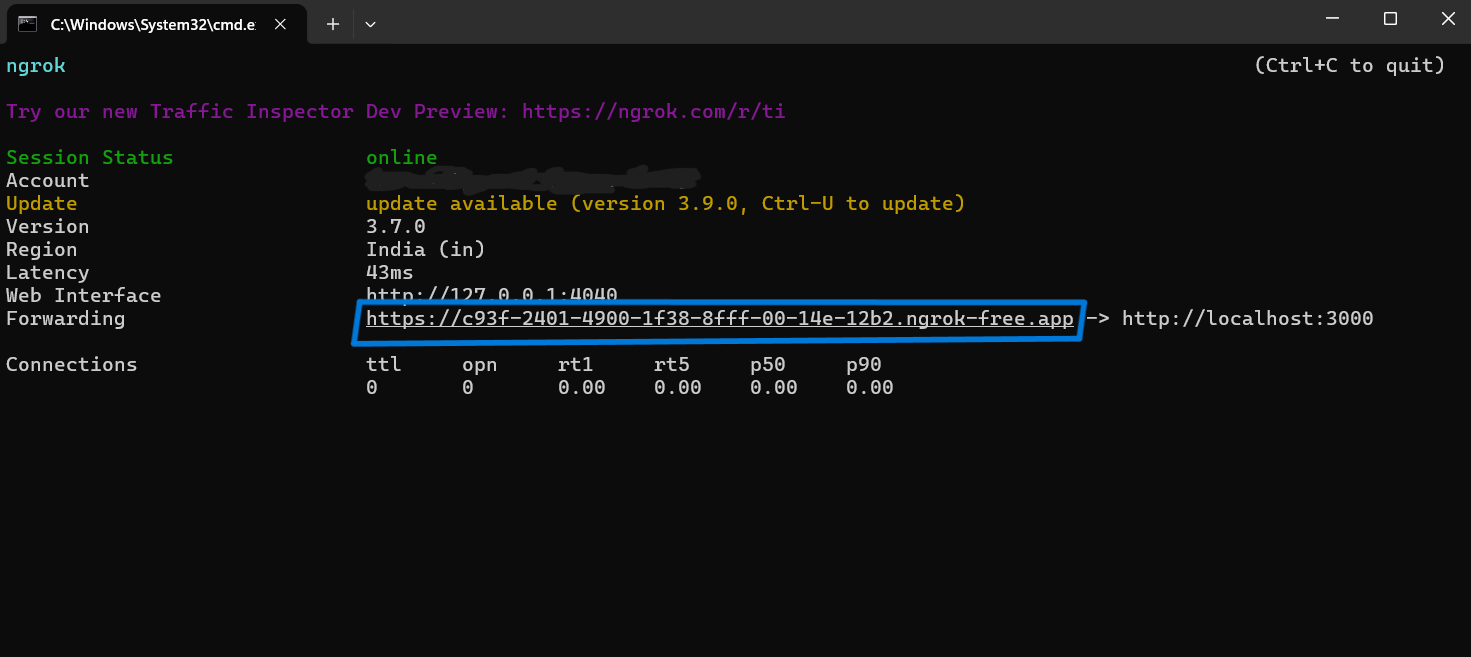
ngrok http 3000This command tells ngrok to start a tunnel session on port 3000 (assuming your bot is running on this port locally). Ngrok will generate a forwarding URL (e.g.,https://c93f-2401-4900-1f38-8fff-00-14e-12b2.ngrok-free.app ) that will route requests to your local bot server.
5. Setting Up Webhook URL
- Using Postman:
Open Postman and create a new request.
Choose the HTTP method as PUT.
Set the request URL to :
https://v1-api.swiftchat.ai/api/bots/<bot-id>/webhook-urlreplacing <bot-id> with your bot Id.In the request body, specify the webhook URL:
"webhook_url":"<forwarding-url>/<bot-api-endpoint>"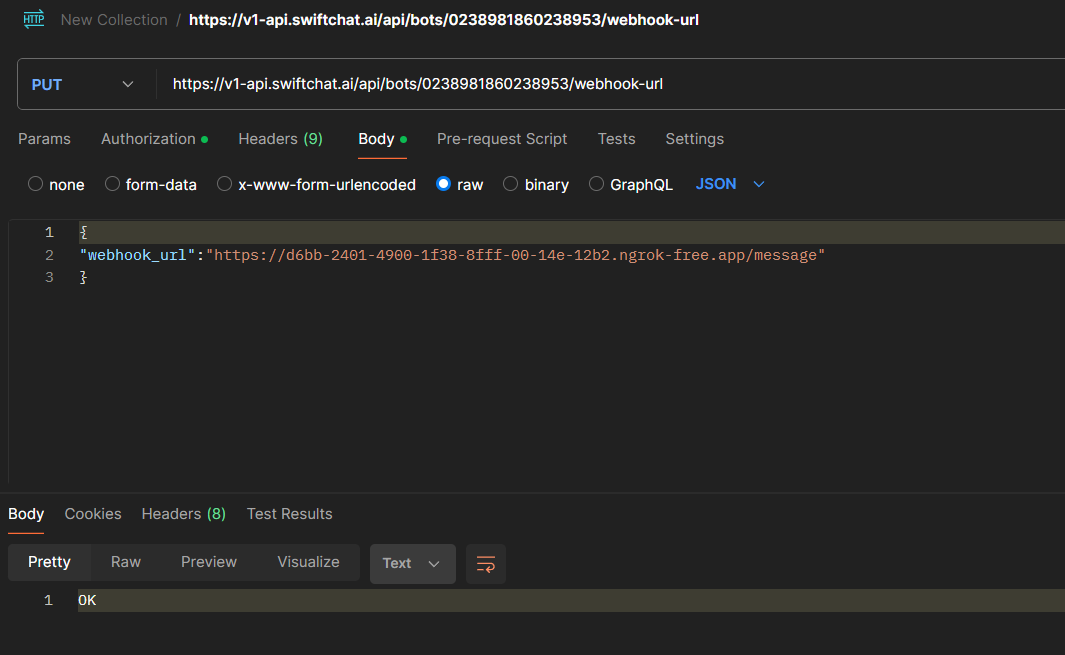
Send the request. This will update the webhook URL for your bot to the ngrok forwarding URL.
Using Curl (Command Line):
curl -X PUT \
-H "Content-Type: application/json" \
-d '{"webhook_url": "<forwarding-url>/<bot-api-endpoint>"}' \
https://v1-api.swiftchat.ai/api/bots/<bot-id>/webhook-url`
Replace ‘<forwarding-url>/<bot-api-endpoint>’ with the actual forwarding-url and endpoint of your bot’s API. This command sends a PUT request with the updated webhook URL to your bot’s API endpoint, setting the ngrok forwarding URL as the webhook URL.
6. Start Your Bot
To get your bot up and running after setting up the Chatbot Starter Kit and making necessary configurations, follow these steps:
Navigate to Your Project Directory: Open your terminal or command prompt and change directory (cd) into the directory where you cloned the Chatbot Starter Kit repository.
Install Dependencies: Run the command
npm installin your terminal. This command will install all the required dependencies for your bot based on the package.json file in the project.Start the Bot Locally: Once all dependencies are installed, start your bot locally by running
npm run startin the terminal. This command will execute the start script specified in the package.json file, which typically launches your bot’s server.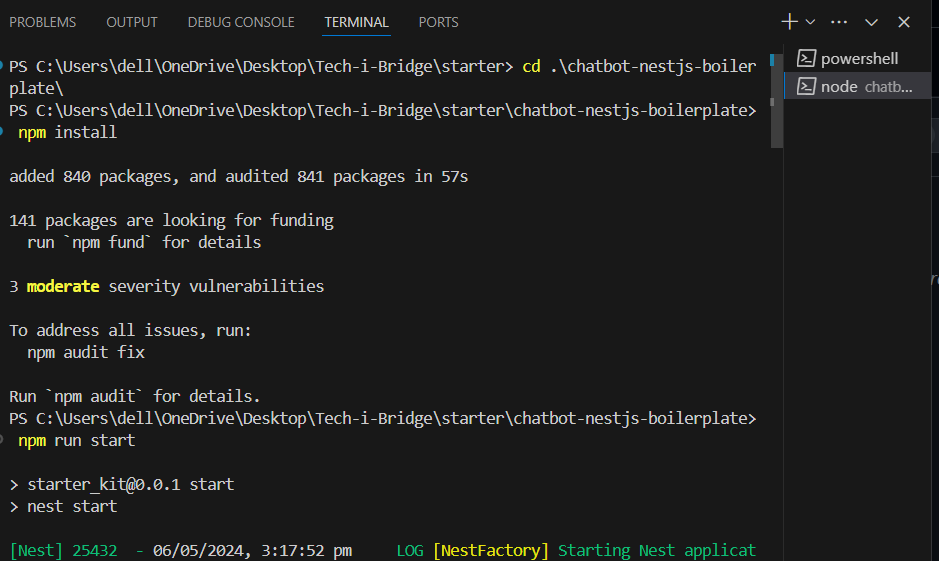
Your bot is now ready, you can test it by visiting the bot URL and saying “hi”. It’ll print a welcome message as configured in the Chatbot Starter Kit. Now it’s up to you, how you want to customize it.
